Introduction to FlowPilot
Welcome! You’re in the right place if you’re just starting out. I’ll try to be as simple as I can. Let’s dive in!
Prep work
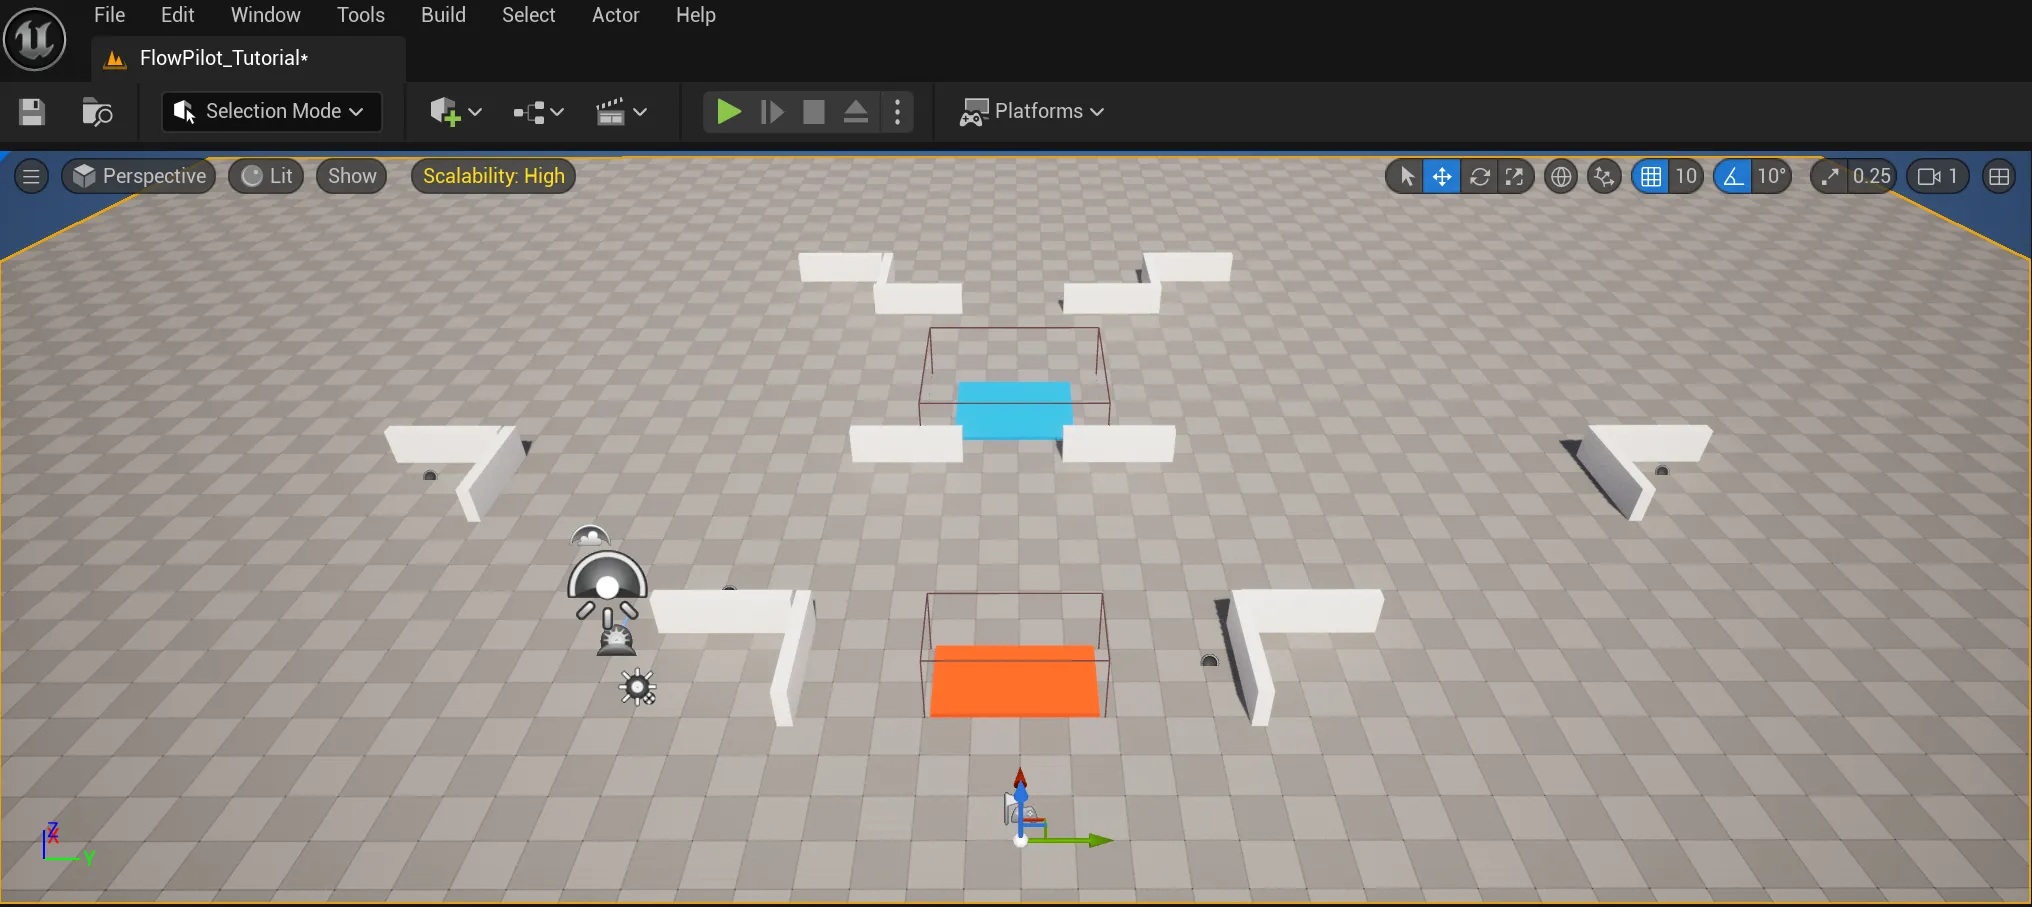
I’m starting this tutorial with a mostly empty level, you won’t need much more than that. I have a basic AI that doesn’t have a behavior and a couple of blocks, and triggers in the level.
Tutorial
Creating a FlowPilot Asset
-
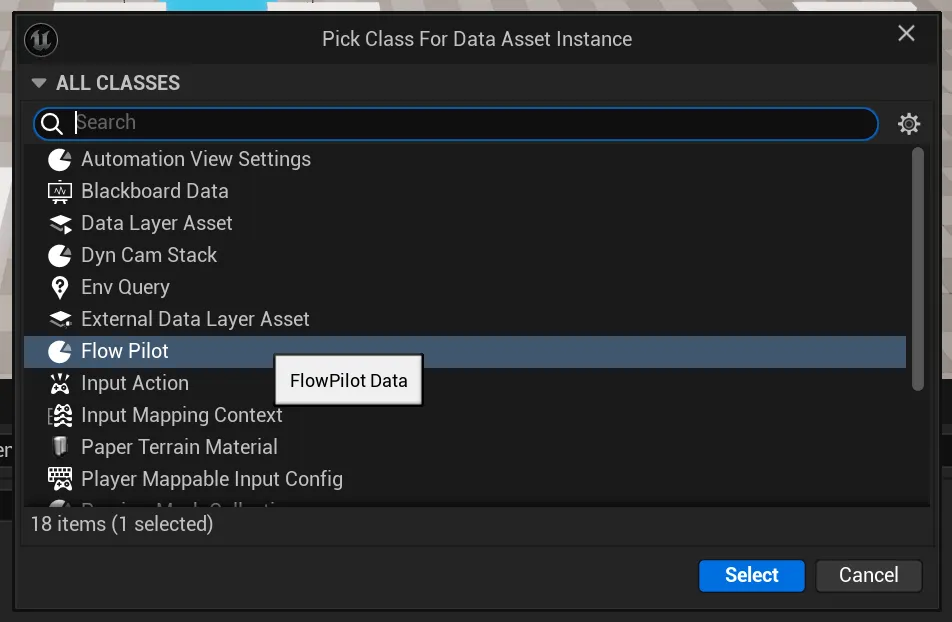
Flow Pilot Asset is found in
Miscellaneous > Data Asset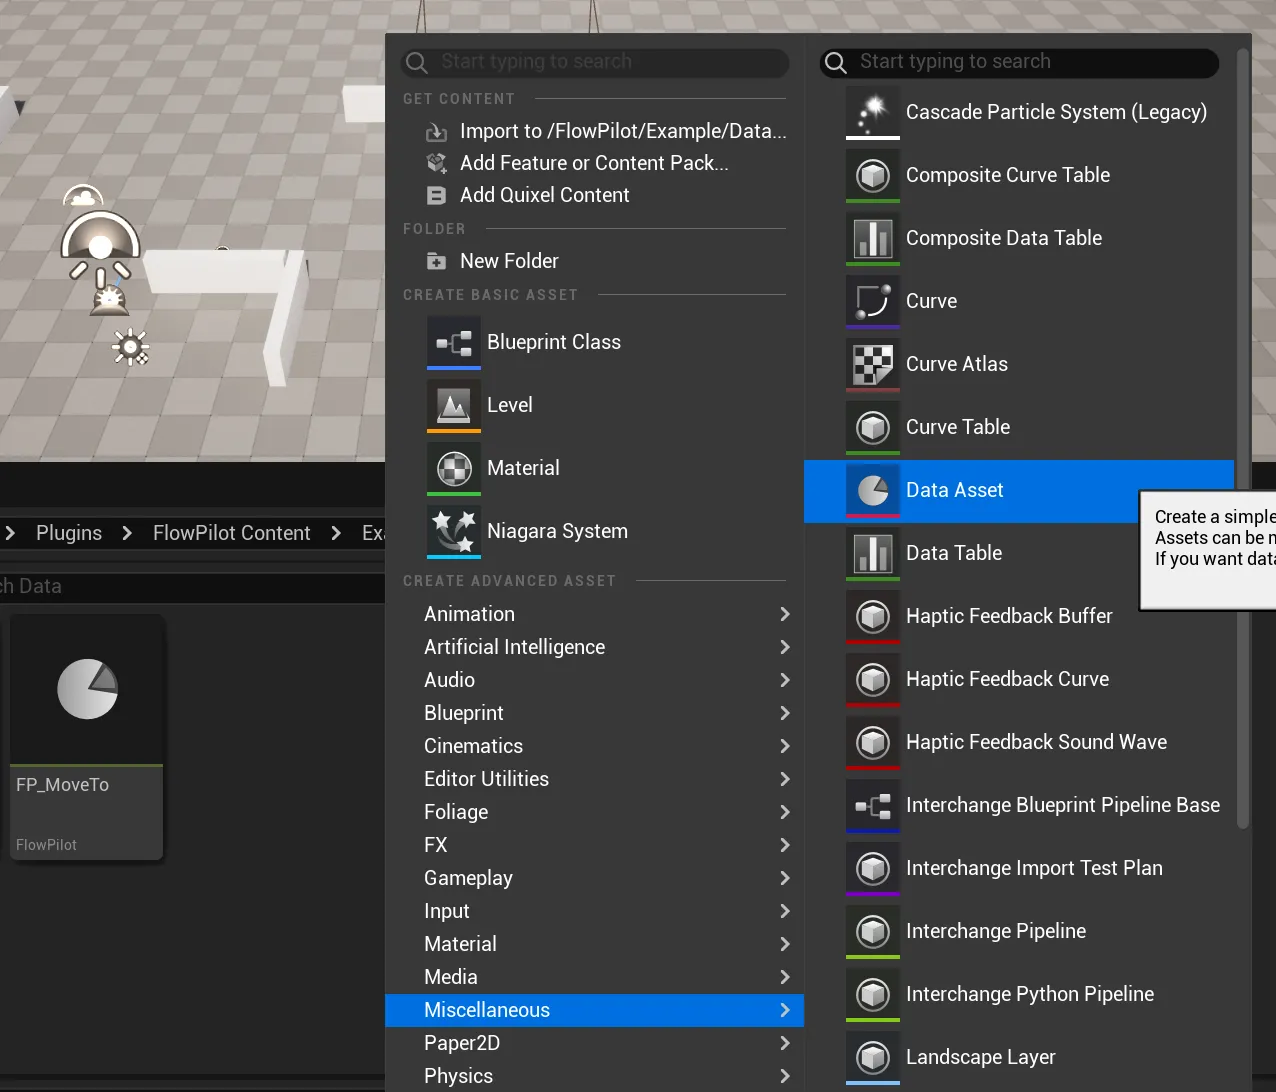
-
Search for FlowPilot
-
Save the Asset. I’ll name mine
FP_Tutorial.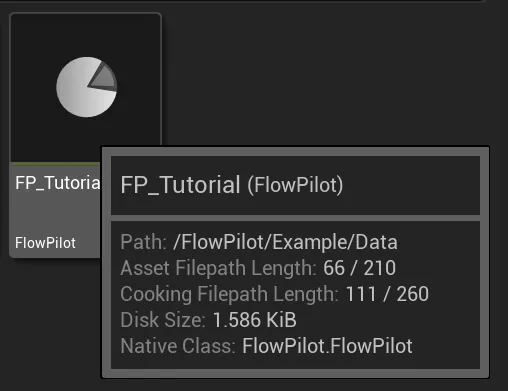
Adding a FlowPilotComponent to an Actor in the Level
We can now add a UFlowPilotComponent to an Actor (you could do this to any Level Blueprint or Actor Blueprint as well.)
-
Create any Empty Actor in the Level and add a
UFlowPilotComponentto it.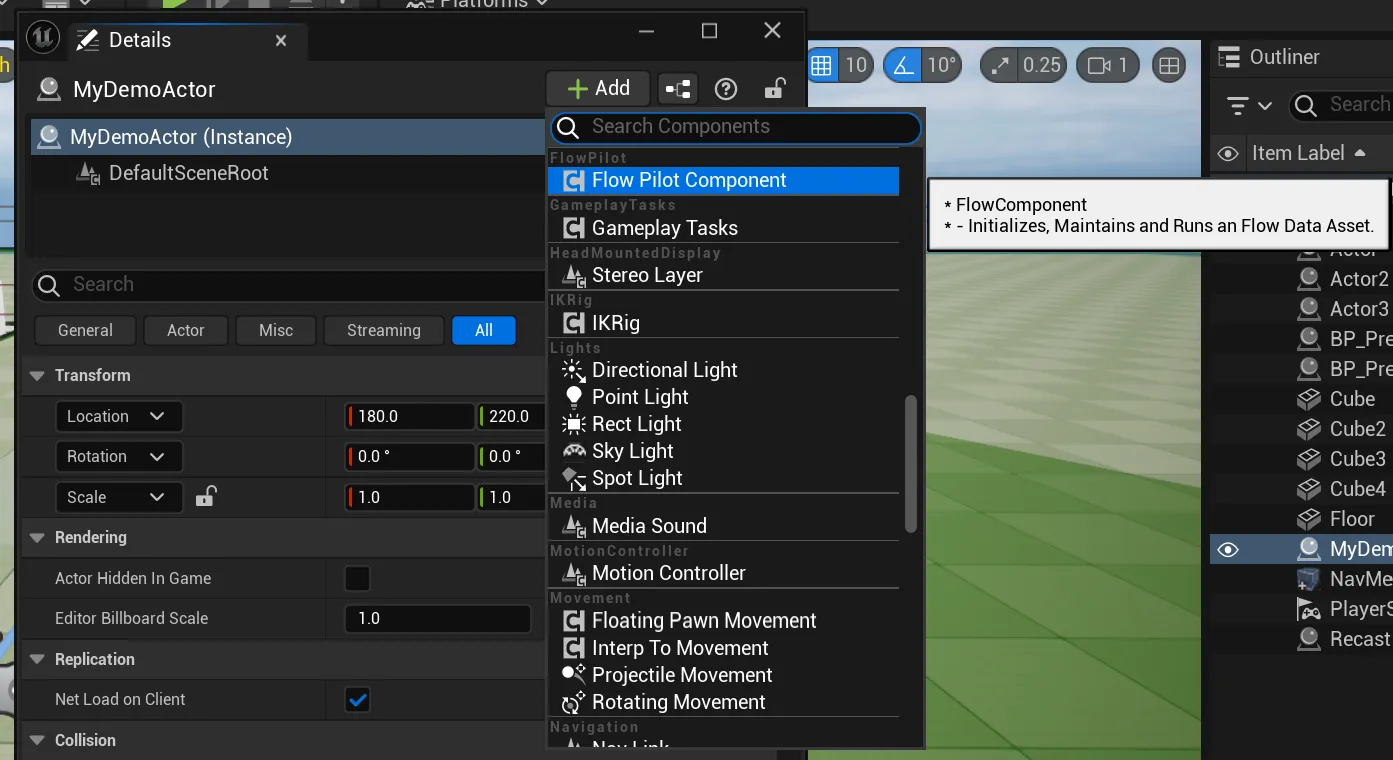
-
Selecting the newly created component we can now reference the asset
FP_Tutorialwe have previously created.
-
Check
Auto Start on Begin Playto start FlowPilot when we start the game. -
Execution Mode handles how FlowPilot Runs, and what happens on Success or Failure. For now, we can leave it as
Run Once.
At this point, you have successfully created a new FlowPilot asset and have an actor that can run the Flow! AMAZING! Lets edit FlowPilot and start seeing it in action!
Editing Flow
-
Open
FP_Tutorial. You’ll see an editor with 3 panels. The left one is a full view of the asset, the middle one shows you the FlowTree and the right panel displays details when a Task is selected from the Tree.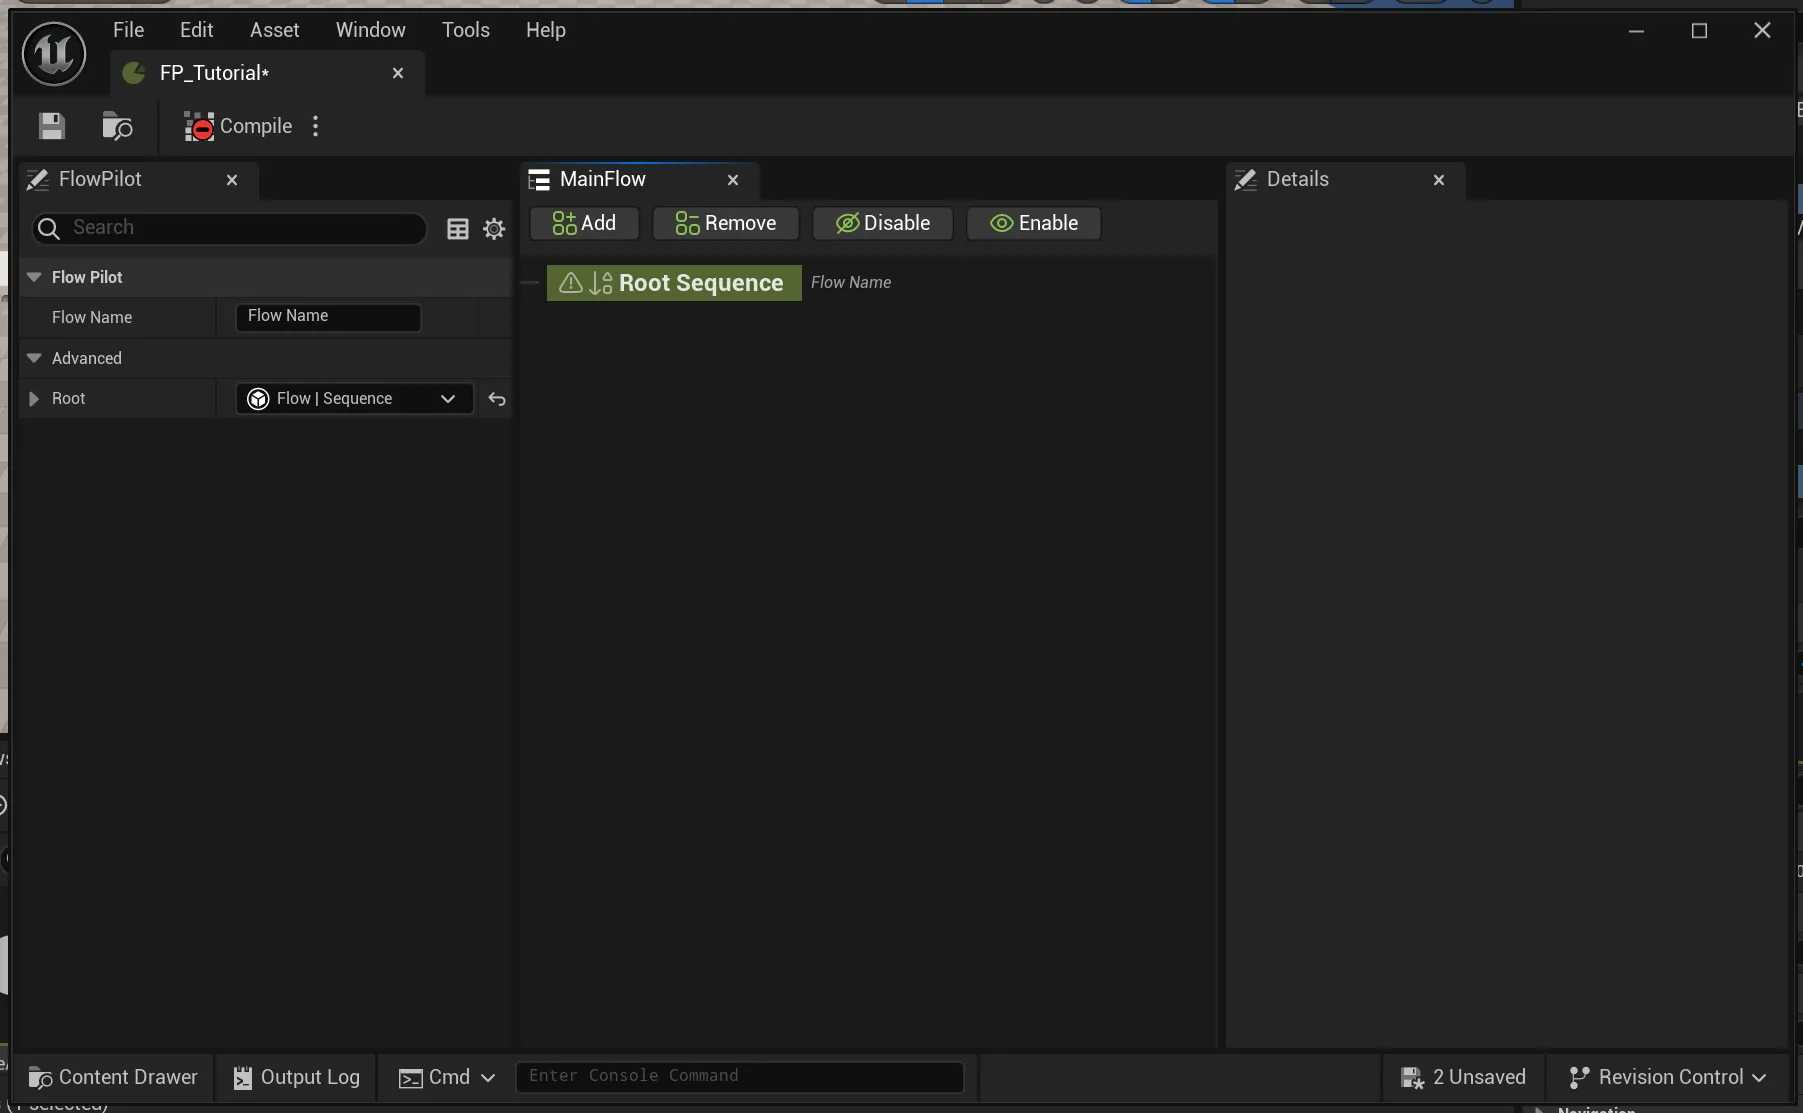
-
Click on
Root Sequenceand then eitherRight Click -> Add TaskorAddButton on the Toolbar. This will create aFPTask_Sequenceby default. WithRoot Sequencestill selected, head over to the Details Tab and change the class forIndex[0]toGameplay | Spawn Class.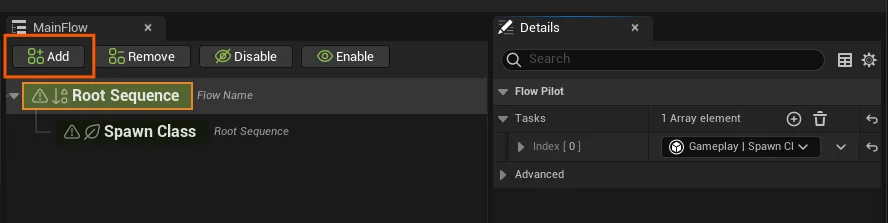
-
Select
Spawn Classfrom the TreeView, and lets examine what we can do on the Details Tab.
-
I’m going to select my AI for property
Spawn Class. Feel free to use any class/actor/bp you’d like -
Save, and Run the game. Lets see what that does.
I’m going to make a few changes to the MainFlow.
-
Go back to
FP_Tutorialand selectSpawn Classtask -
Change Property
ActorSpawnLifetimefromFlowPilottoPersistent -
Save, and Run the game.
Change Spawn Location
Right now, the AI we’re spawning is using the Actor where UFlowPilotComponent was added, as the source location.
This is done with the Property Spawn Location Reference. This property is a custom type called FFlowActorReference.
You can read more about FFlowActorReference
Lets now change where we spawn the AI.
-
Go back to
FP_Tutorialand selectSpawn Classtask -
In the details panel, change
Spawn Location ReferenceScopefromSelftoIn Level -
Lets create a new Actor in the level, and reference that in
Level Actor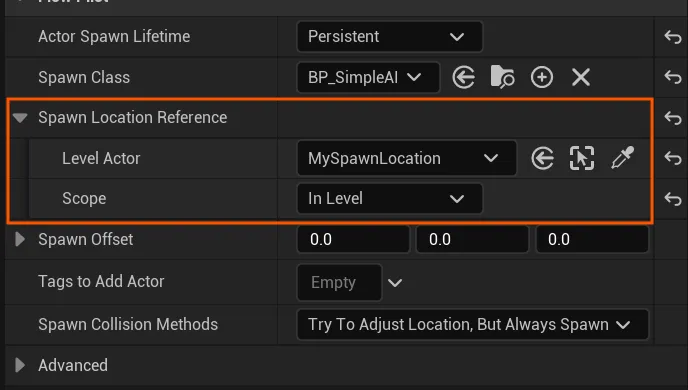
-
Save and Run.
You should now see the Actor spawn at the new location.
There’s a third Scope option for FFlowActorReference which is Runtime.
Runtime means the actor we want to find and use is not yet in the level. This is every actor that is spawned during gameplay, therefor at Runtime.
The way FlowPilot handles this is using GameplayTags. FlowPilot uses GameplayTags to easily find single, or groups of actors that have the tag.
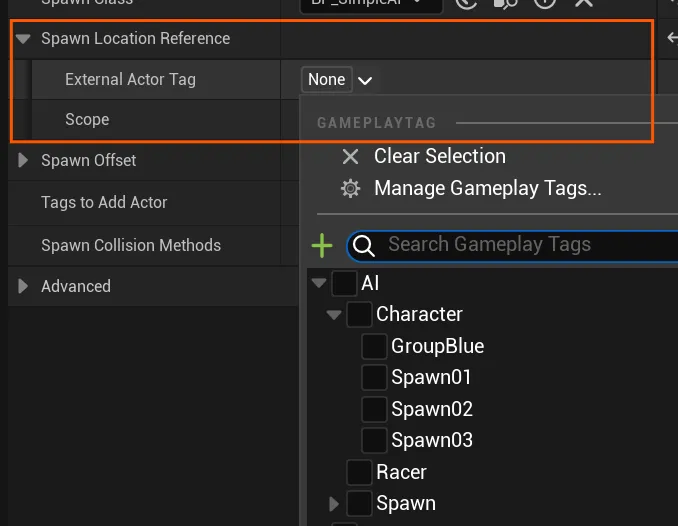
I’ll leave this one for you as a task.
Add a Tag to any Actor in your level, and reference it. Does your actor spawn at that location?
Wrapping Up
You should now have a basic understanding of how to create, edit, and run FlowPilot.
We covered how to create an asset, linking the asset to a UFlowPilotComponent, spawn actors in game, and use GameplayTags to find Actors.
These constitute the barebones of FlowPilot.
Go explore other more in depth Guides. Happy game developing!
